Machine Learning can be used to make predictions and cluster like data. How can we integrate some basic Machine Learning capabilities with Power BI and have a backend that handles the logic and dependencies? This article provides a basic how-to, showing one way to deploy a Python Machine Learning API and connect via Power BI.
One key benefit from a Power BI standpoint - this eliminates the need to be tied to a personal data gateway or worry about Python/Power BI compatibility issues. Separating concerns (a web service handles all of our Machine Learning and Python backend) boils down the exchange of data to simple HTTP POST request, well understood and supported by most reporting and web-based tools.
From Power BI’s standpoint, it’s just making a POST request - with the data to be clustered sent as a JSON object - and then retrieving results from the web service to enrich the initial dataset.
Problem Overview
For demonstration, I created a fictitious dataset containing housing data. With only a handful of features, a rough guess can be made on how they will be clustered. You can see the data below - a couple of the houses are smaller, a couple in the middle, and one large outlier.
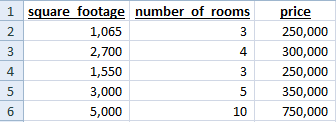
Given the breaks in this data, we can manually cluster by just looking at the records. However, on a large dataset this may not be possible and writing manual rules may be time-consuming. How can we use machine learning to automatically clustering our data into like groups? In this demo, we’ll use the following approach:
- Create an account on PythonAnywhere to host our Python API.
- Send data from Power BI (more specifically PowerQuery) to our Web API and add the cluster group as a new column in our data.
Setting Up PythonAnywhere
Creating an Account
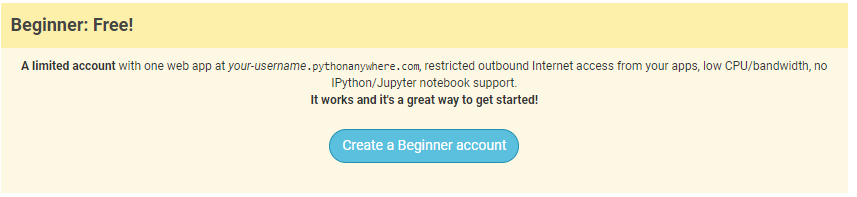
The first step is to create an account on PythonAnywhere. They have a free beginner tier, which is perfect for this demo, learning, and small personal projects.
Click the create account button and you’ll be prompted to enter a username, email, and password. Once you login, you’ll see the header in the top right corner. We’ll be using the Dashboard, Consoles, Files, and Web tabs.

Setting up a Python Virtual Environment
The first thing we need to do after logging in is to setup a virtual environment with the relevant python packages. Click the Bash button on the PythonAnywhere Dashboard to open up a new console, and execute the following commands:
-
Create a new virtual environment, specifying the python version and name. I used version 3.7 and pbi_demo for the name. The environment should activate once you create it. You can also use the workon command to switch between environments.
mkvirtualenv --python=/usr/bin/python3.7 pbi_demo -
Install required python packages using pip:
pip install flask flask-restful marshmallow numpy pandas scikit-learn
Once this is complete, navigate back to the dashboard. The next step is to create a web app.
Creating a Web App
Click the Web header at the top and then the Add a new web app option. Accept the default domain and choose a manual configuration with Python Version 3.7 (or matching what you chose in the previous step). There are a few additional options we want to change outlined in the next steps.
WSGI Configuration File
The first modification is the WSGI configuration file under the Code heading. Click on the link (ends in .py) to open the file.
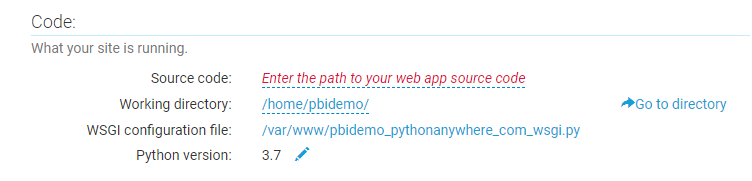
This code gets called first when the server is loaded. The default code in this file is setup by PythonAnywhere and contains comments that give you an overview of some functionality. For this demo, delete out everything and replace with the following (change the username string to match your build):
import sys

# add your project directory to the sys.path
project_home = u'/home/username/pbi_demo'
if project_home not in sys.path:
    sys.path = [project_home] + sys.path

# import flask app but need to call it "application" for WSGI to work
from SimpleRecommendation import app as application  # noqa
This code adds our project to the system path and then imports our app. Save this file and navigate back to the Web tab.
Virtual Environment
The next step is to point our web app to the virtual environment we created. Click on the Enter path to a virtualenv link and type in your path (example below).
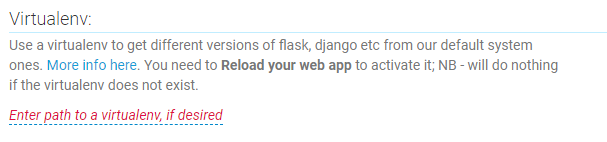
/home/username/.virtualenvs/pbi_demoHTTPS
Finally we’ll Force HTTPS for security purposes:
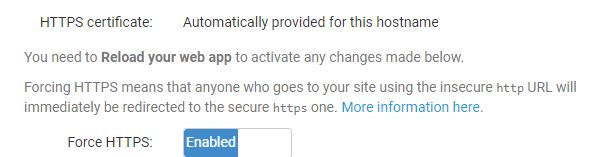
That is it on the Web tab for now, time to write some Python!
Python Code
Project Setup
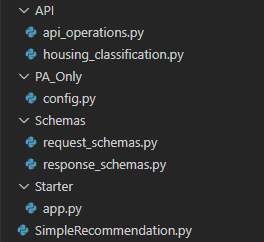
This example is simple enough that we could reduce the logic to one or two files; however, in order to allow for easier integrations later I will separate many of the imports and components. The overall project is structured as followed.
App Starter Code
Flask and Flask-RESTful are used as the web and API framework. A seperate Python module will be purposed to just spin up the app and api to be used in later stages.
from flask import Flask
from flask_restful import Api

app = Flask(__name__)
api = Api(app)Schemas
Marshmallow is used to help validate and structure data for both incoming requests (made by Power BI) and outgoing responses back to Power BI after the clustering logic has ran.
You’ll see that the request_schemas.py file below has a RequestInput class (inherits Marshmallow’s Schema) that matches the columns in our csv.
The ClusterResultSchema class specifies the outputs that will be returned to Power BI after the clustering code has ran - row to allow a join back to the original data and group to denote the cluster each house is in. The many=True option is used since inputs and outputs have multiple records.
from marshmallow import Schema, fields

class RequestInput(Schema):
    square_footage = fields.Integer(required=True, strict=True)
    number_of_rooms = fields.Integer(required=True, strict=True)
    price = fields.Integer(required=True, strict=True)

# Input Schema
request_input_schema_multiple = RequestInput(many=True)from marshmallow import Schema, fields
class ClusterResultSchema(Schema):
row = fields.Integer(required=True, strict=True)
group = fields.Integer(required=True, strict=True)
# Output Schema
response_schema_multiple = ClusterResultSchema(many=True)Machine Learning
Scikit-learn and more specifically KMeans Clustering is used to cluster the data. The cluster_houses function below is responsible for clustering the data given an input dictionary containing the various records (houses).
from sklearn.cluster import KMeans
import numpy as np
import pandas as pd

def cluster_houses(input_data):
    """Cluster housing data using KMeans

    Args:
        input_data (dict): api request data containing houses to be clustered

    Returns:
        list: list of dict objects containing row and cluster group
    """
    data = pd.DataFrame.from_dict(input_data).to_numpy()
    kmeans = KMeans(n_clusters=3, random_state=42).fit(data)
return [{'row': (i+1), 'group': label} for i, label in enumerate(kmeans.labels_)]API Operations
The bulk of the code is handling and parsing the the data, as well as sending back the response. The api_operations.py file below is responsible for tying all the pieces together and exposing the API endpoint. Using the HTTP Post method, Power BI submits data that will be parsed, classifications ran, and then results dumped to a json string in the response.
# Flask Library Imports
from flask import request, json
from flask_restful import Resource

# Local object imports
from Starter.app import api
from Schemas.request_schemas import request_input_schema_multiple
from Schemas.response_schemas import response_schema_multiple

# ML Logic
from API.housing_clustering import cluster_houses


def parse_request(request):
    """Parse json from request

    Args:
        request: incoming request from User api call

    Returns:
        dict: json dict from request object
    """
    parsed_result = request.get_json(force=True)
    return parsed_result


class HousingClustering(Resource):

    def post(self):

        try:
            # Parse request into json and validate schema
            json_data = parse_request(request)
            errors = request_input_schema_multiple.validate(json_data)

            # If errors exist abort and send to api caller
            if errors:
                return str(errors), 400

            # Run clustering
            results = cluster_houses(json_data)

            # Dump results and ok status back to caller
            return response_schema_multiple.dumps(results), 200

        # Unknown error return 404
        except:
            return 'Unknown Error', 404

# Expose API endpoint
api.add_resource(HousingClustering, '/HousingClustering')Entry Point
Finally, a simple high level module is used as an entry point for PythonAnywhere. It simply imports the Flask and API objects to keep the file light and cleanly structured. This allows for easier enhancements, additional features or endpoints, etc that can be incorporated easily.
If you recall earlier when setting up the WSGI file, the app object from SimpleRecommendation was imported in that code - this is the file it is referencing.
from Starter.app import *
from API.api_operations import *And that is it for the python code. The next step will be uploading these files and testing out the app.
Web App Uploads
Time to upload our .py files to PythonAnywhere. If you click on the Files header, you’ll see existing system and default files. Create a new directory named pbi_demo (note this was used in our earlier config file) and then upload the files with the same folder structure/nesting. SimpleRecommendation.py will be at the top level of this new directory, with the other files in new subdirectories.
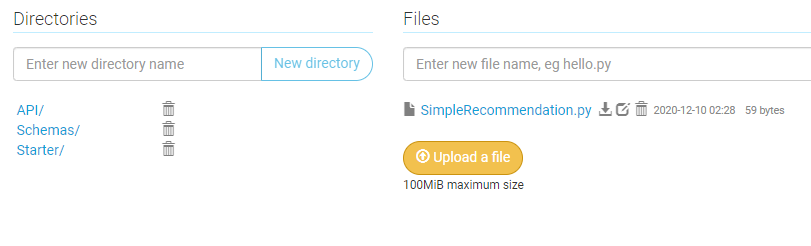
Once all the files have been uploaded, click the Web tab and then the Reload button to reload the web app server.

PowerQuery
Code
Processing the data, sending results, and retrieving clusters can all be done in PowerQuery. At a high level, the below code does the following:
- Read in csv data containing housing attributes using the Csv.Document function.
- Translate the data into a json string that can be accepted by our API using the Json.FromValue function.
- Parse the results returned by our API (including a row for joining and the cluster group) using the Json.Document function.
- Translate the data back into a table and join to our original dataset, essentially adding the cluster group as a new column.
let
    // Read in input csv
    Source = Csv.Document(
        File.Contents("D:\test_data.csv"),
        [
            Delimiter=",",
            Columns=3,
            Encoding=1252,
            QuoteStyle=QuoteStyle.None
        ]
    ),

    // Promote headers and update types
    headers_promoted = Table.PromoteHeaders(
        Source,
        [PromoteAllScalars=true]
    ),
    type_changes = Table.TransformColumnTypes(
        headers_promoted,
        {
            {"square_footage", Int64.Type},
            {"number_of_rooms", Int64.Type},
            {"price", Int64.Type}
        }
    ),

    // Build API Parms
    api_url = "https://user.pythonanywhere.com/HousingClustering",
    content_input = Json.FromValue(type_changes),
    header = [
        #"Content-Type"="application/json",
        #"accept"="application/json"
    ],

    // Make API call
    web_results = Json.Document(
        Web.Contents(
            api_url,
            [Content=content_input]
        )
    ),

    // Convert api results to a table
    json_doc = Json.Document(web_results),
    table_from_list = Table.FromRecords(json_doc),
    update_types = Table.TransformColumnTypes(
        table_from_list,
        {
            {"row", Int64.Type},
            {"group", Int64.Type}
        }
    ),

    // Join source and results
    idx = Table.AddIndexColumn(
        type_changes,
        "Index",  // Col Name
        1,        // Initial
        1,        // Increment
        Int64.Type
    ),
    joined_tables = Table.Join(
        idx,      // Table 1
        "Index",  // Join Col 1
        update_types, // Table 2
        "row"         // Join Col 2
    ),
    final_cols = Table.RemoveColumns(
        joined_tables,
        {"Index", "row"}
    )

in
   final_cols
Results
You can see the results below after the last step of the PowerQuery code has completed.
Our API returned a group number (starting with 0) for each record. The actual number doesn’t signify anything, but those houses with the same number are clustered together - displaying similar characteristics as determined by KMeans. With this small dataset, it did pretty well. The two smallest and cheapest houses were grouped together (Cluster #2), the next two largest grouped together (Cluster #0), and the largest outlier we manually spotted is clustered by itself (Cluster #1)!

Benefits
So what are the benefits with an API-driven approach? We could’ve run this python program locally and just added the results to our csv file; however, separating out our Machine Learning logic into a separate API has some additional benefits:
- We handle the python dependencies in one place (on PythonAnywhere in this example). This avoids having to integrate Python with Power BI directly or worry about having multiple user machines setup with the correct libraries and compatibility. No need to be tied to a personal data gateway or worry about Python/Power BI compatibility issues!
- Instead of running the classification one time locally, we can now refresh our Power BI dataset in the Service with new data - retrieving clusters without having to modify anything. Just feed in new data and get back updated results - PowerQuery and our python API handle all of the heavy lifting.
- We can optimize the Machine Learning Algorithm on the backend without having to make changes to our Power BI file or PowerQuery code. Power BI just knows to send the three columns and expects the group (and row column to join on) in return. As long as our API performs this task, we can optimize the actual clustering, test out different algorithms, etc - all without Power BI needing to know of any changes.
Caveats
This demo shows an example of end-to-end machine learning from initial dataset through pulling results into a BI tool. However, this doesn’t mean you should take exactly this approach. There are a few things worth calling out that may slightly change how you implement something like this in practice:
- Your company likely has a preferred way of deploying virtual machines and APIs. Follow your company’s approach. While setting up a personal PythonAnywhere account with Flask can quickly expose an API endpoint, your company likely has a more rigorous approach for good reasons (cloud provider of choice for cost and integration benefits, service account management, technical assets hosted inside the company firewall, etc).
- There are more efficient ways for very large datasets. Sending a large number of records over an API POST method may be slow based on network speed. An alternative option would be to upload data in bulk, process, and then save off the results to a SQL table for instance. This pre-processing could be done off hours and speed up the amount of time Power BI is waiting for the data. At that point, it just becomes a SQL query to get the final results. However, this does require additional engineering work and ETL logic.
- There are cloud solutions in place provide a lot of this functionality out-of-the-box. For example Azure Machine Learning is one example that integrates well in the Azure environment. Dataflows also have AI capabilities that provide a tighter integration with Power BI. If you have Power BI Premium this would be much easier to setup, albeit with less customization options.
Summary
I hope this walkthrough was helpful and gets you thinking of ways to integrate Machine Learning and AI with Power BI in a way that is repeatable and automated.
Interested in your thoughts, if you found this approach helpful or have used different approaches in the past to solve similar issues - comment below!
All examples and files available on Github.